

Restoring an Open M19
by Jeremy Winkworth
In early 2000, I purchased an open M19. Restoration of this car had already started, with the engine being rebuilt and new axles, bearings, wheels and drive belt in place. Some of the remaining parts needed were supplied but far short of everything. In 2001, I made a determined effort to finish it. Little did I know how much time, effort and money would be spent...........
First, a little history (thank you Ken): This car, a Fairmont M19F-3, was originally purchased in July 1957 by the Pacific Great Eastern Railway (PGE), now known as BCRail. It was shipped on August 21, 1957 to Squamish, BC. The engine number is 76516, which dates back to Nov. 1946. It is not the original engine. This particular one started in an PGE M19D-5 and at some point ended up in this car.
|
Here is the car in "as received" condition. While the floor and fenders were new, the engine compartment sides were in sad shape, with many holes, dents and some pieces broken off. They looked pretty awful so job 1 was to fabricate some new sides. I used 90 thou. structural grade aluminum (50% thicker than 1/16"). A friend helped with riveting the angle aluminum at top and bottom of the sides (thank you Jim!). |
|
Here it is with the new sides added. I decided to use oak for the wood support and oak plywood over the engine compartment. I cut some aluminum to go on top of the plywood, since an open car will get more weather on the tunnel top. It took a week's vacation time to get the tunnel sides and top into place with all the necessary holes and supporting angle/wood. Brackets for the crank handle are in place (thank you Eric!). You can't see it but I purchased and installed a gas tank guard from Les King. Rather than paint the wood I varnished all of it. That will keep the weather out! |
|
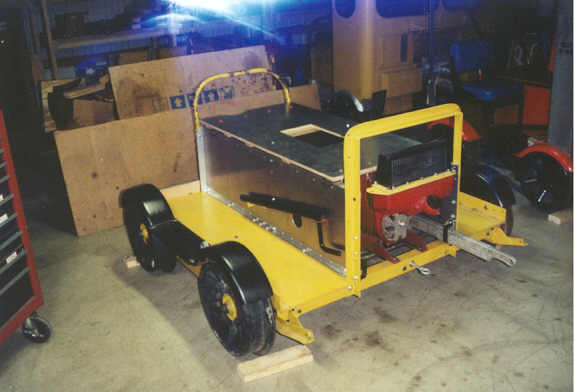
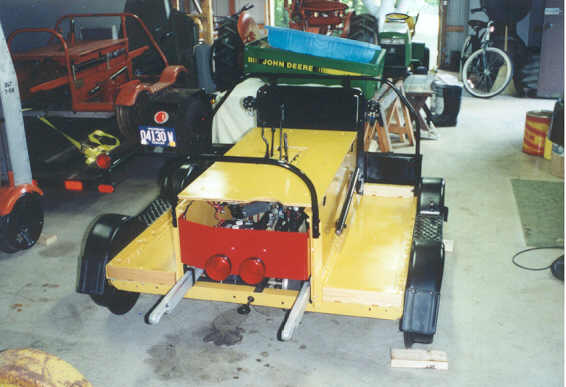
Now more parts have been added - the front safety rail, made from standard iron water pipe (much sturdier than the typical Fairmont stock), two new toolboxes, rail sweeps, the control panel and both lift handles. The wood at both ends of the floor has been cut, drilled and put into place with the aluminum flat stock on top. I also found enough parts to make up a complete brake system. Phew - this was a LOT of work. |
|
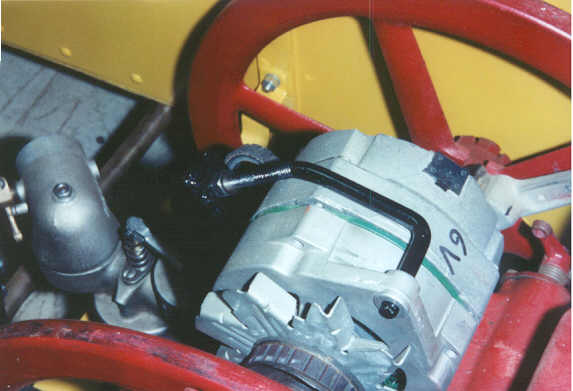
The Fairmont alternator bracket had to be modified so it would fit under the front support cross member of the control panel (thank you, Ken). This involved bending the adjustment rod more than it was previously and reducing the height of the bracket. It now fits beautifully under the cross member. It's a little hard to see here but if you're familiar with the standard Fairmont alternator bracket you'll notice the difference at the top of it. |
|
I also constructed a battery tray from 1"x1/8" aluminum angle. It is suspended on springs and rides about an inch above the rear axle. The battery is held down by two black rubber straps (two in case one should fail or come undone). |
|
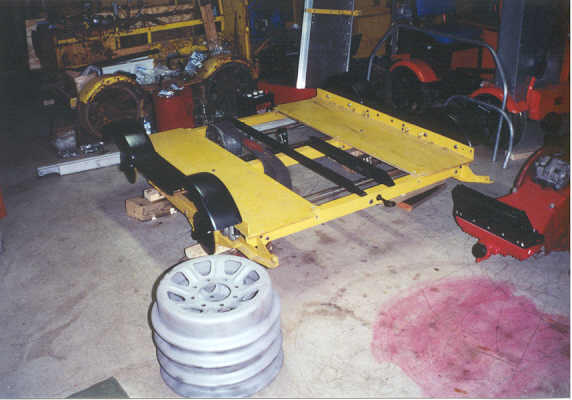
Looks like a step backwards but I've stripped it down for painting of many components. The wheels, safety rails and lift handles were sand blasted. It took almost three weeks to clean and paint everything. The floors are 1/8" aluminum on top of 3/16" plywood, not glued together. While this does not match the Fairmont "plymetal" spec, I've seen too many rusted out steel floors so I stuck with the aluminum. |
|
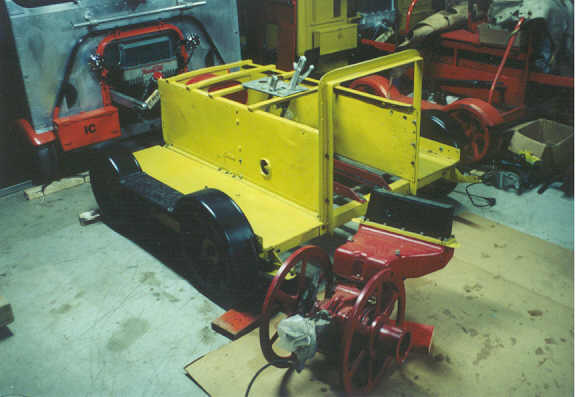
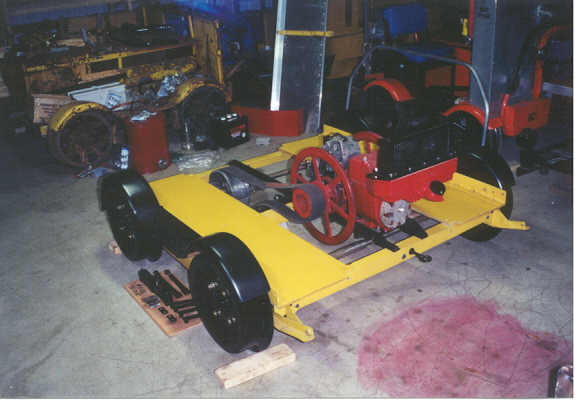
I stuck with yellow and black coloring, except the red engine. The water hopper isn't normally red but it came that way and I didn't change it. I installed the engine before adding the bodywork around it. The wheels are back on and you can see all the brake components on the ground between the wheels waiting to be installed. The ROC engine was already rebuilt. |
|
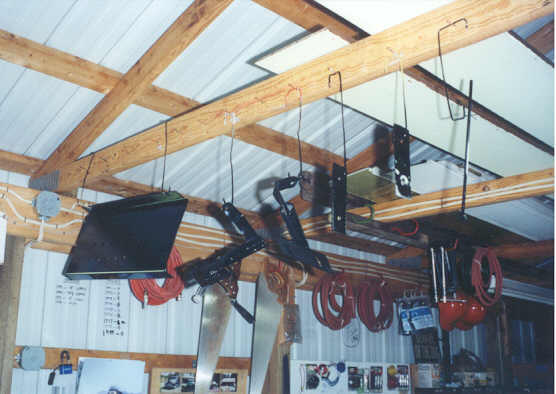
Paint, paint, paint. Here are a few parts drying over a couple of coats of gloss black. I used Rustoleum spray enamel without any primer for the small parts. I've never had any finish problems when doing this. |
|
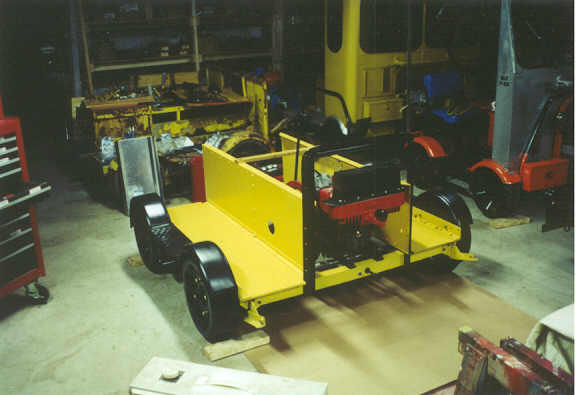
Here it is with the main bodywork back on it. The color scheme is not prototypical, although car colors changed over the years and some railroads specified different colors than the standard yellow and orange (so protypical color schemes are all over the map anyway!). |
|
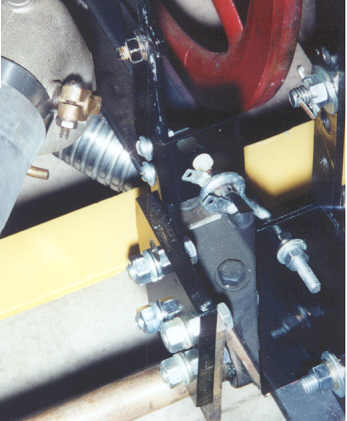
This is the brake switch, located close to the bottom of the brake lever. I used a bullet type switch from an auto store mounted in a bent eye bolt, which goes through some angle aluminum. The important thing is that it can be quickly and easily adjusted if necessary. I located it here at the bottom of the lever to keep it out of the way. |
|
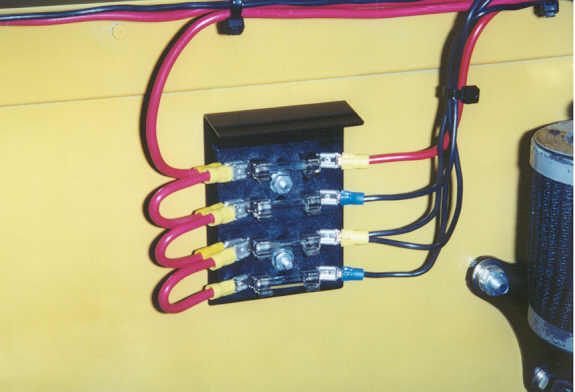
Here's the fuse block. Fairmont cars did not contain fuse blocks as original equipment. However, there is a real risk of shorting out and burning up the wiring so if you are rewiring, it would recommend using fuses. Put this in as dry a location as you can get. I used mostly #14 wire with #10 for the alternator and main lead through the ammeter to the fusebox. I also stick with 6V systems. |
|
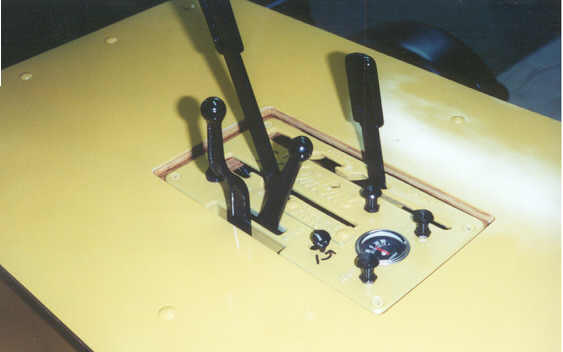
The control panel. The ammeter is a 60A model to match the 60A one-wire 6V alternator from JC Whitney. The push-pull switchs are marine grade bought from C-ME Marine on the web - $4 a piece. They are all brass construction. I painted the switch parts above the panel black to match the general color scheme. The horn button is marine grade also and covered with rubber. On an open car, the goal is to keep the electrical system going in bad weather. |
|
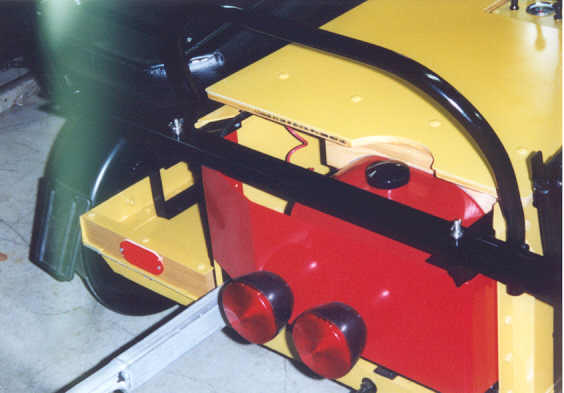
I mounted the rear lights on the gas tank protector. Two lights with twin filament bulbs allow for rear lights and brake lights. I bought 6V bulbs separately at the local auto store. |
|
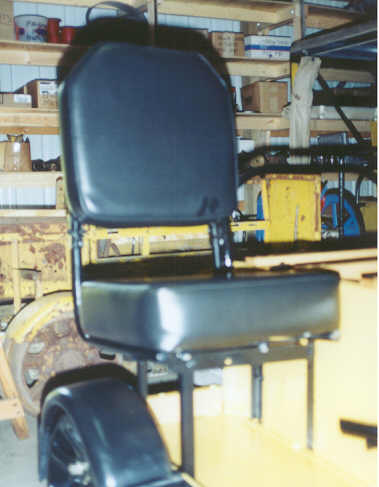
Since I didn't want to sit on the boards, I ordered two seats from Les King. These are Fairmont spec and really nice seats, reasonably priced. Don't buy cheap boats seats unless your budget allows for nothing else - the boat seats I've used have not been comfortable on long excursions. |
|
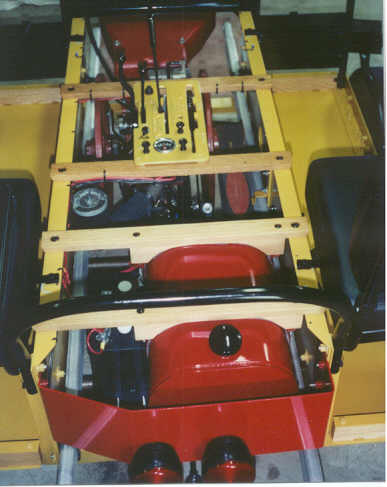
I didn't like the condition of the oval gas tank that came with the car - too many dents. As I happened to have an extra one in really good shape. I cleaned it, painted it and put it in. It looks great, as you can see in this view of the engine compartment from the rear. |
|
|
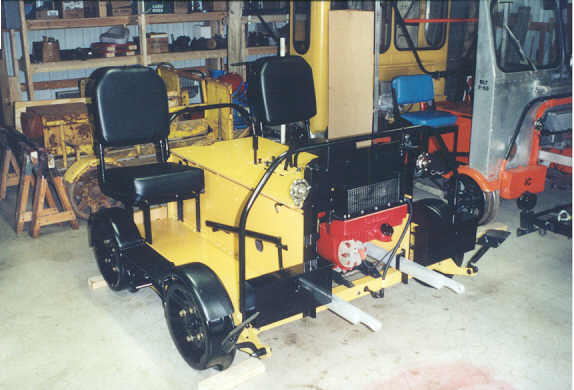
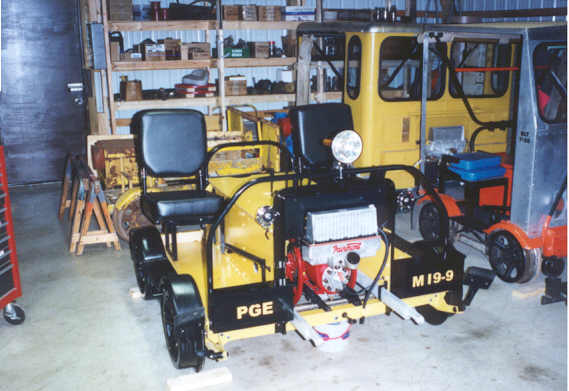
So, here's the car with the seats on it, rail sweeps added and pretty much everything done. I just need a headlight, tow bar and some vinyl decals at this point. |
|
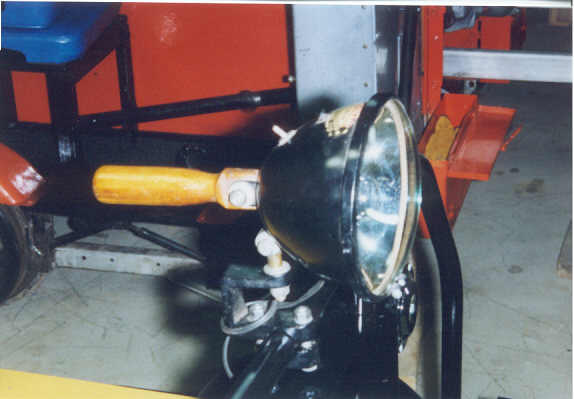
Found a suitable headlight that I'm guessing was originally used on a motor car. It swivels up/down and side to side. Getting a bulb for it was a challenge though. None of the local auto or tractor dealers had a clue. I finally tracked one down at Northwestern Supply Co in Grand Rapids, MI. |
|
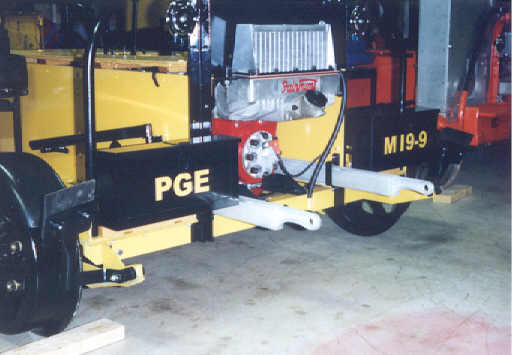
Getting vinyl decals was a lot easier. I chose to put them on the toolboxes and used a similar shade of yellow to the paint used. The railroad number assigned to this car really was M19-9. |
|
The toolbar is a piece of 1"x 2" steel stock (thank you, Ken). Being an open car, space to store items like this is at a premium so it's bolted onto brackets at the rear that hold it above the fuel tank protector. |
|
Here's the finished car. Alas, I couldn't start it with the rebuilt engine that came with it so I swapped in an ROC restored by Eric Schwandt - started up first time. The job was done!!!!!!!!!!!!! |
Well, not quite. A test run at the Coopersville and Marne RR showed that the overflow tube from the condenser was plugged solid and that I had not correctly wired up the front headlight. Both of these problems were fixed and I felt that the car was ready to go.
First Excursion - I took it up to the Lake Superior and Ispeming RR (LS&I) in Upper Michigan. Alas, it rained for most of the day so I got very wet and the car did too. However, the good news was that it never missed a beat, started well and had no problems, even though the switches on the control panel were sitting in little puddles of water.
So how much did it cost? If you include the original price of the car and the cost of restoring an engine it all added up to $3200. Quite a significant sum but I did get pretty much a brand new motor car for that money. It also took about three weeks of vacation spread out over 4 months.
Would I do it all over again? Yes, but I'll wait a couple of years before I start another..............
Last Edited 28 January, 2018