
2003 Project - Narrow Gauge
Conversion
by Jeremy Winkworth
What are friends for? To talk you into building a narrow gauge motor car, of course! Mike Mitzel persuaded me that we should ride the East Broad Top and since it has narrow gauge rails (36" instead and 56 and 1/2"), narrow gauge cars are required. I chose to convert a ex-Grand Trunk & Western standard gauge Fairmont M19 that I had bought a year or two back.
|
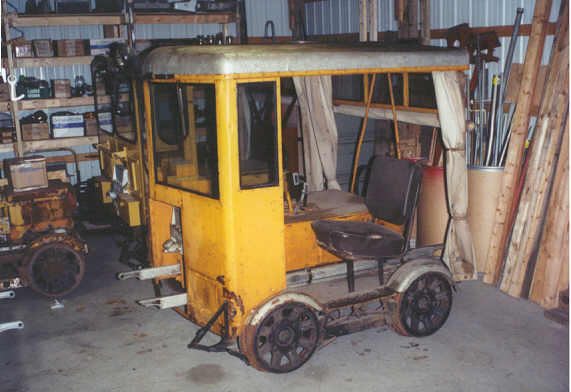
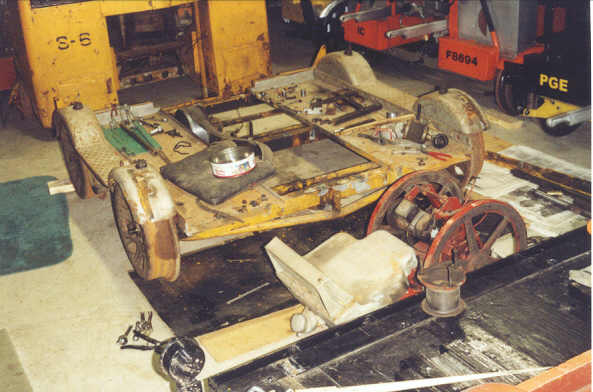
Here's the starting point - a standard M19 with a steel Fairmont cab. The build sheet shows it as a 1944 car, originally supplied without the cab. This car has not be used for better than 20 years. |
|
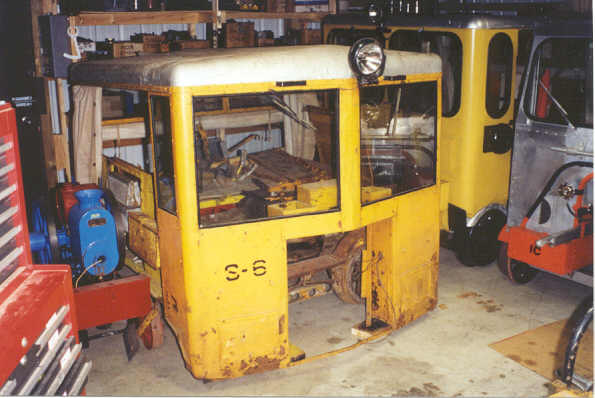
I started on New Year's Eve 2002. The first job was to remove the cab. It came off very easily and in one piece. To save space, I stored it over an open DSS&A M19 awaiting restoration. It has now been sold. |
|
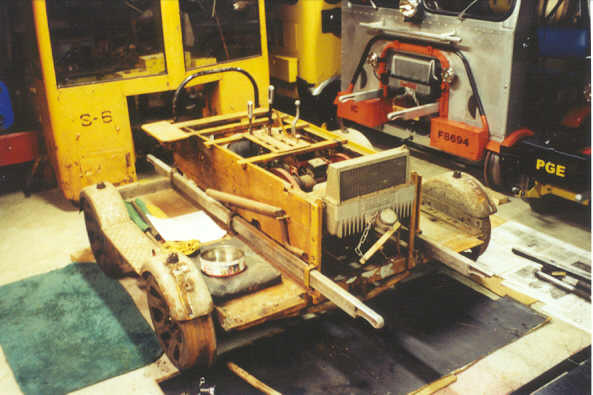
Here we see the remainder of the car. It has a Fairmont ROD engine, one of the predecessor models of the ROC. Basically, everything on the car was in pretty decent shape. |
|
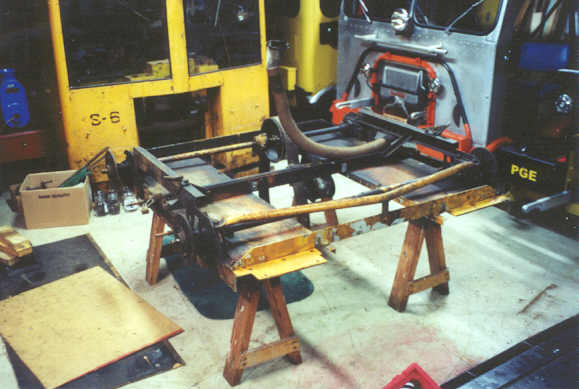
The engine tunnel is now off. The plan is to cut out 10 and 1/4" width from the floor on each side of the car and cut the frame members by the same amount on each side. The axles and the brake rod will need to be "slimmed" also. |
|
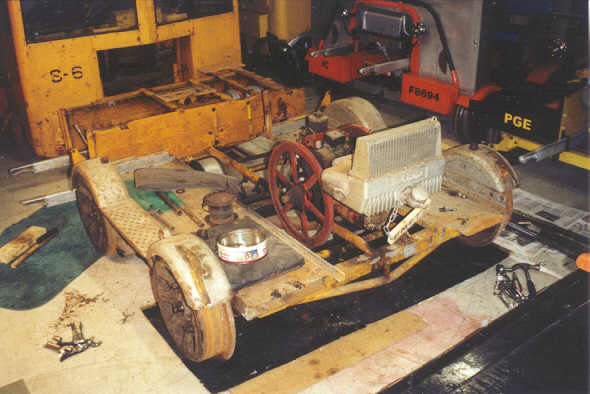
The engine is now out. Fortunately, Les King sells both narrow gauge rear axles and narrow gauge brake rods. Front axles can be made by making the longer half-axle the same length as the shorter one and reassembling them. |
|
Now the car is upside down and I'm working on getting the sub-frames and the axles off. The sub-frames turns out to be one piece welded steel. |
|
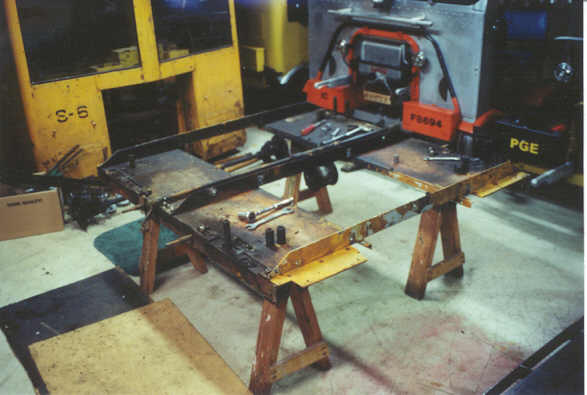
Finally I'm down to the brake rod, the floor and the frame members. While this surgery is going on, a friend puts the long axle-half from the front end into his lathe and creates an axle-half of equal length to the short one. |
|
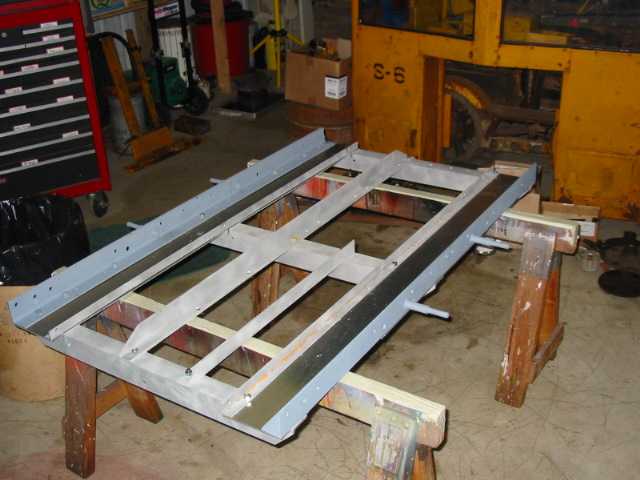
The phoenix starts to arise! The cross members of the frame have been cut (10 and 1/4 inches off each end). The new floors, made of 1/8 inch grade 6061 (i.e. hardened) aluminum sheet are in place. |
|
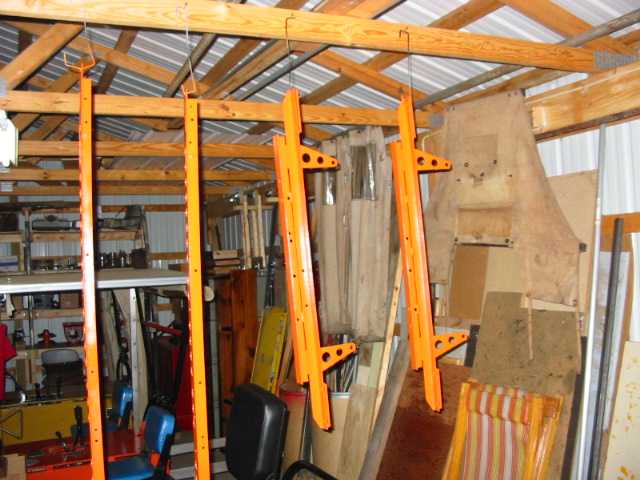
On the right are the sub-frames, made from steel pieces welded together. (remember this was built in 1944 - aluminum was being used for the war effort). One sub-frame was bent and needed to be straightened. I decided that Kobota Orange looked very close to Safety Orange so I'm using that color. |
|
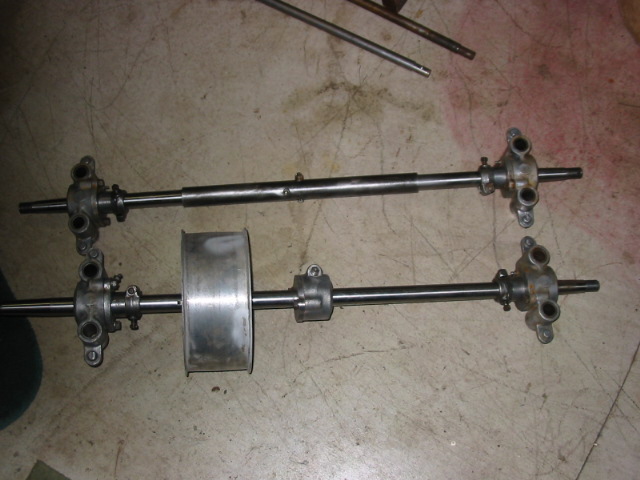
Here are the axles. The front one at the top was made by machining the longer axle-half to the same length as the shorter one. The rear axle came from Les King. Interestingly, the rear axle pulley is one piece instead of the usual two. The bearings were cleaned and appear to be serviceable. |
|
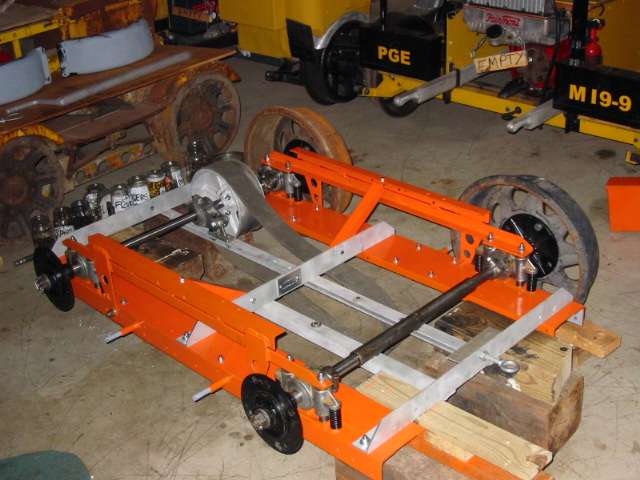
Now here's some progress! I painted the new floors and the outside frame members. I've got the sub-frames, bearings, axles and hubs back on the car. Be sure that the bearing guides are well greased before you reassemble the bearings. |
|
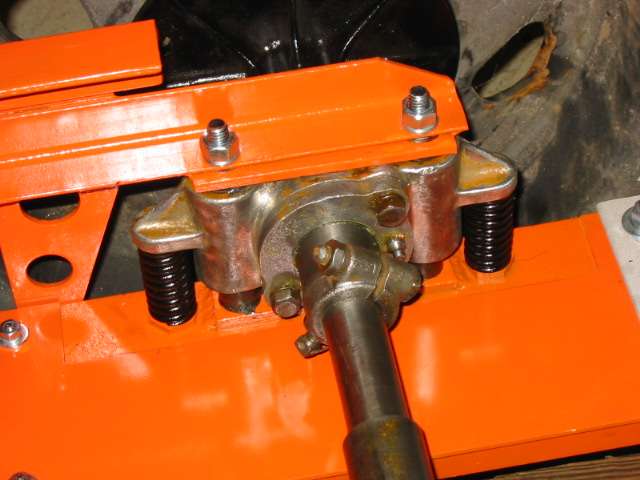
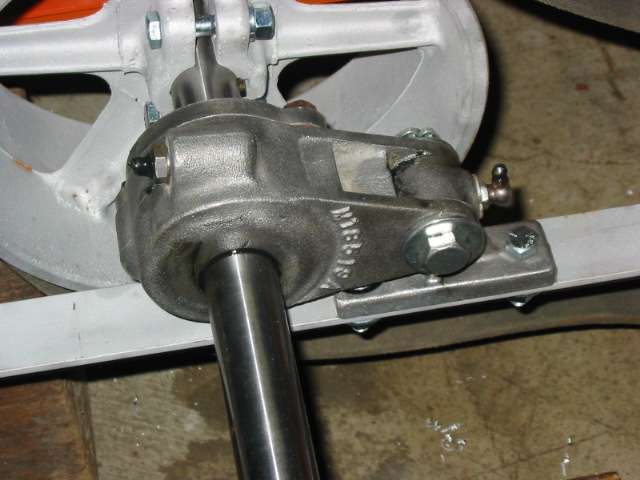
Here's a close-up of a bearing in place. Note the two piece axle collar. There should be no play when the collars are in position. |
|
Here's the bearing in the middle of the rear axle that helps reduce the axle stress when the drive belt is tightened. M9's and M19's should have at least one of these. |
|
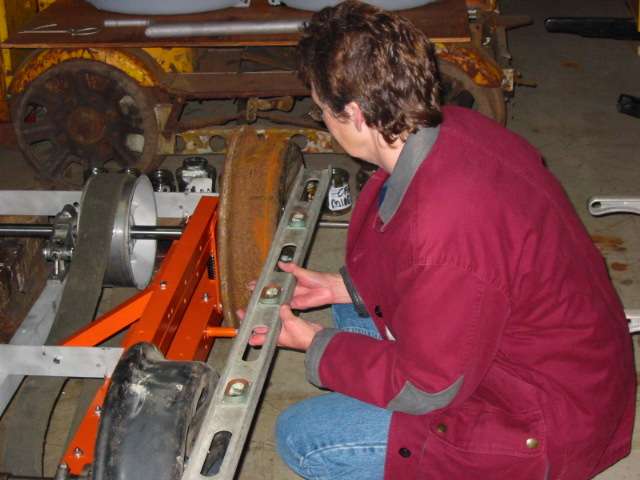
I needed to make sure that the gauge is correct so I bolted all the wheels on and measured across the car from the outside of the wheels. For the car to be exactly at narrow gauge, this should be 42 and 7/16 inches. I also checked how well aligned the axles were by placing a straight-edge along the outside of the two wheels as above. Ideally they should be parallel and in-line with each other. Luckily for me they were. |
|
Painting, painting, painting - gas tank, wheels, brake parts, control levers, control panel, safety rails and two dozen other parts. I use Rustoleum for anything black or red and had never had any problems. At this point I'm really starting to hate painting....... |
|
|
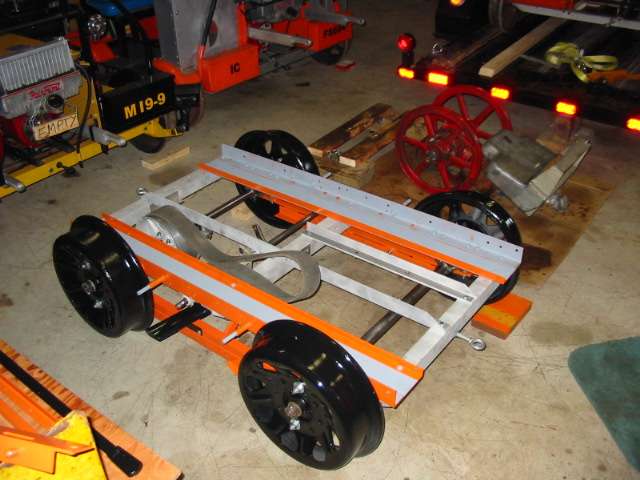
Finally, the underside is done and the car can be turned right-side up. Next up will be getting the engine tunnel in place. |
|
|
Eric Schwandt rebuild the engine for me. It needed a new oil seal (there's only one on this engine), new bearings between the crank and piston rod and a gasket on the carburetor. Then it started right up after a 25 year slumber. I did end up cleaning out the exhaust ports. That's very important - if the ports are blocked the engine won't run at all or will not have much power. |
|
|
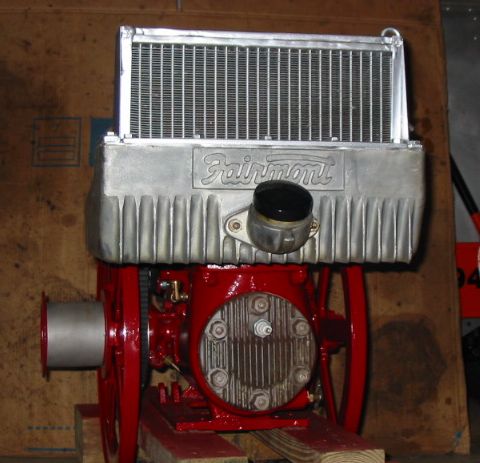
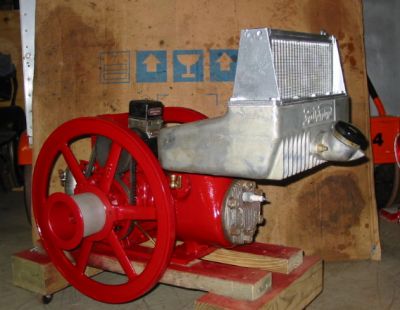
I cleaned and sanded the engine, then painted the block and flywheels using Rustoleum Regal Red. It's close to the red that Fairmont used on their engines. Don't paint the water hopper - it needs to shed heat as quickly as possible. Don't paint where the belt pulley runs either. I did put a light coat of aluminum paint on the condenser. |
|
|
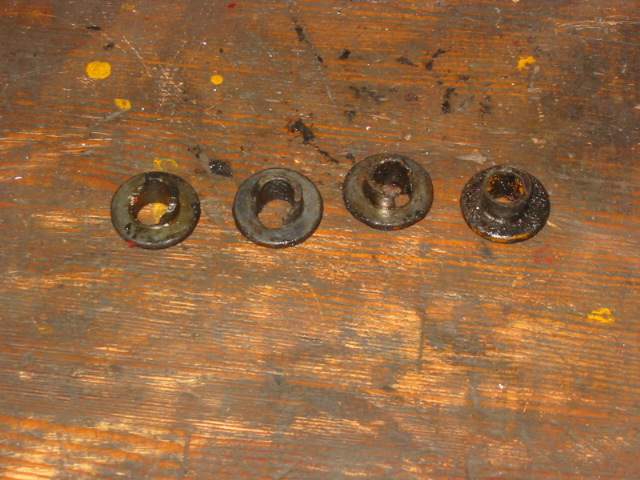
These are the engine bushings from the car. Three were broken and the hole in the fourth one is an oval shape. This is the wear and tear you may see on an un-restored car, especially one that does not have an engine stabilizer kit installed. |
|
|
Here's the installation of the Fairmont generator using standard Fairmont brackets. The important thing is to line the generator pulley with the belt pulley on the crankshaft. Use a pry bar under the generator to tighten the belt. |
|
|
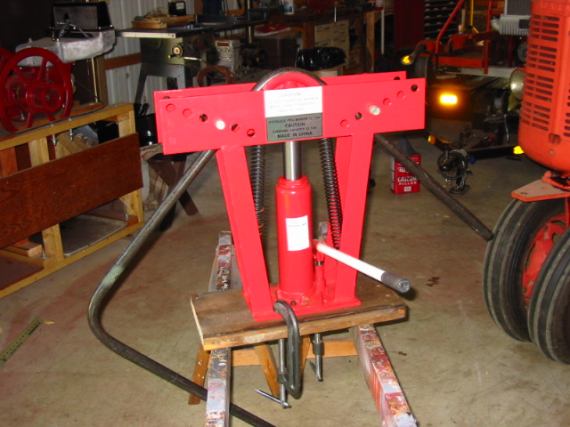
For fabrication of a front safety rail, I used 3/4" black iron natural gas pipe. You can bend it as you need. Despite its thick wall it does bend very well. A hydraulic pipe bender helped to do the work. I heated up the pipe first with a propane torch so it wasn't completely cold when bending. |
|
|
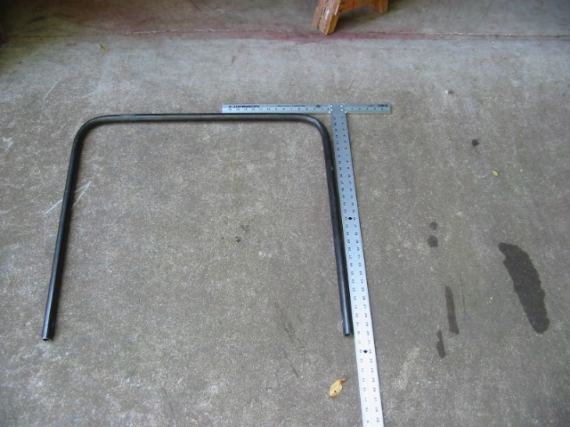
On a standard gauge M19 I wouldn't have to make a ninety degree bend. However, losing twenty inches of width meant that this was the only option. Here I'm checking that I've got a ninety degree bend. Minor adjustments to the angle were made by hand. |
|
|
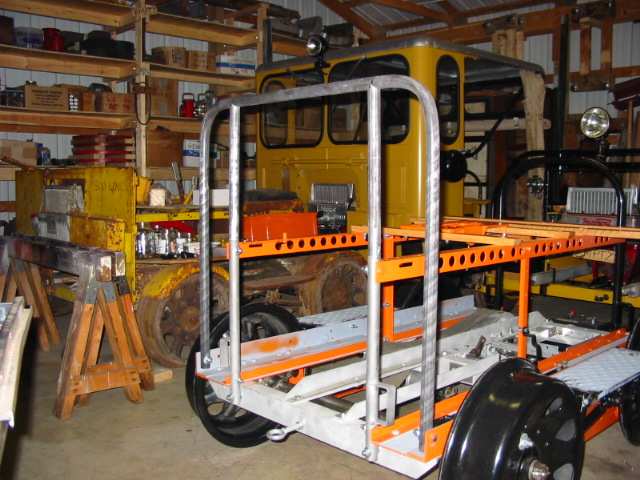
Here's the unpainted front safety rail on the car. I had the lower halves of the inside vertical pieces on the car already and since they had the lift handle brackets attached and all the holes drilled, I didn't want to start from fresh. A friend made extension pieces to reach the top safety rail. |
|
|
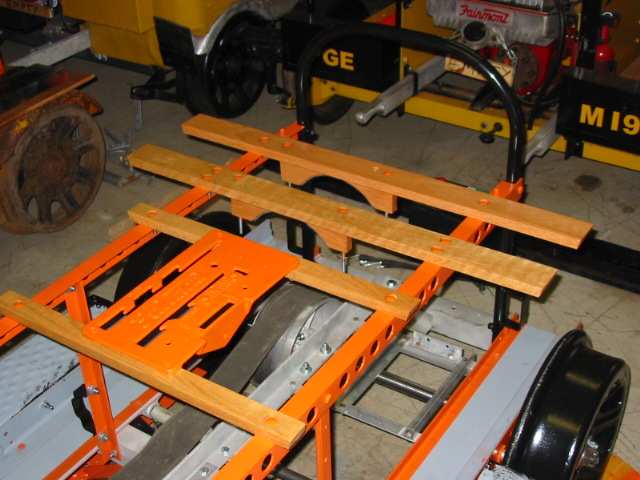
Here's some of the wood that supports the top of the tunnel. I used white oak with two coats of varnish. That's not original - painted ash was probably what Fairmont used but I prefer to see the wood. |
|
|
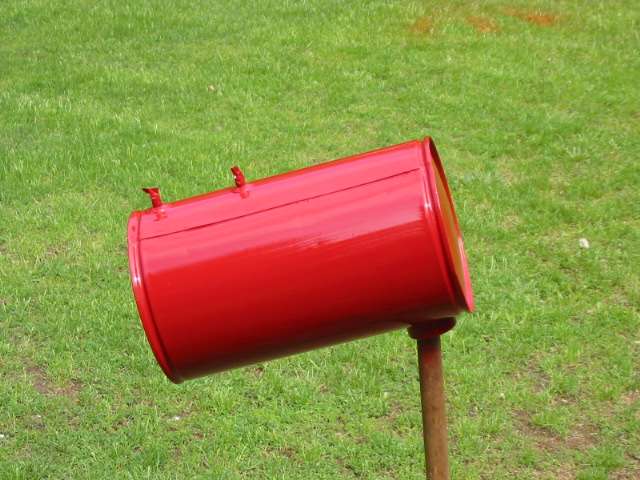
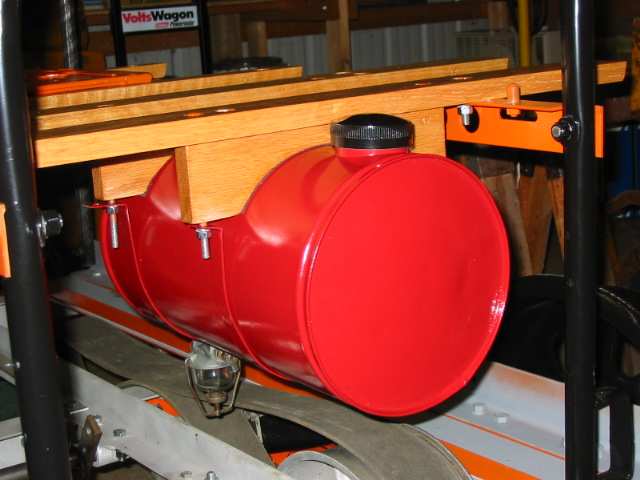
Here's the gas tank fitted back onto the car. No magic here. |
|
|
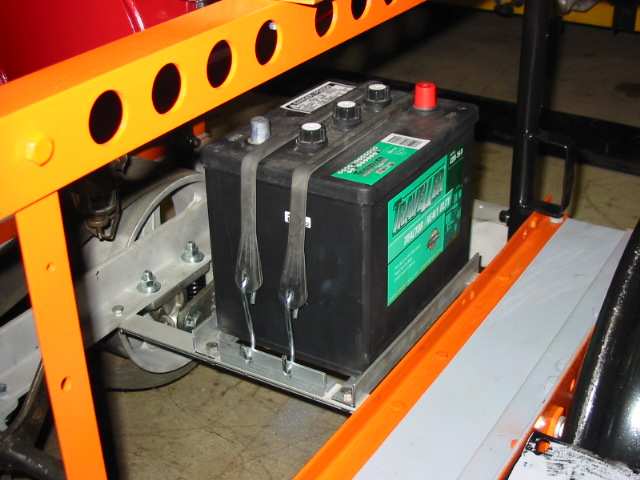
The original battery support was non-original and looked like hell so I fabricated this out of 1" aluminum angle. I could have used some springs under it to prolong battery life but the car is sprung anyway and it was only be used a couple of times a year. The battery is 6V, as are the rest of my cars. |
|
|
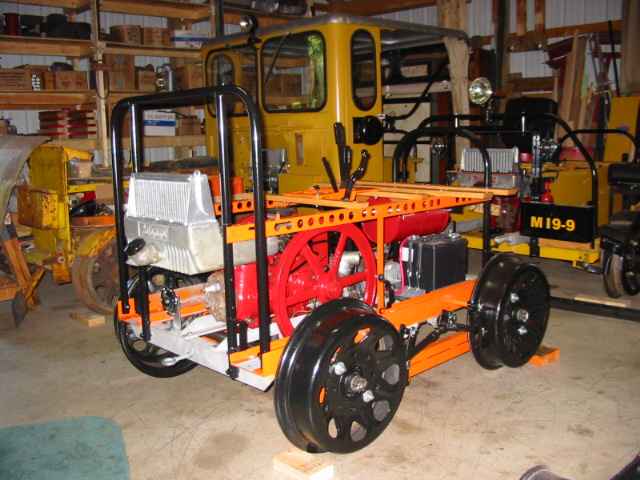
Hey, this is starting to look like a motor car again. The front rail is painted and installed, the engine is back in and the control levers are all in place. |
|
|
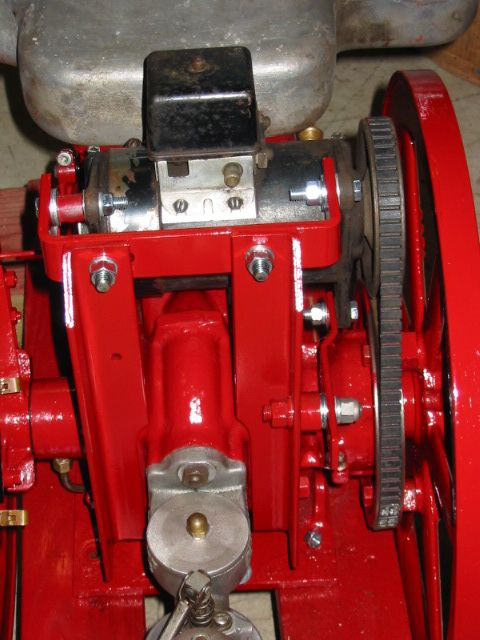
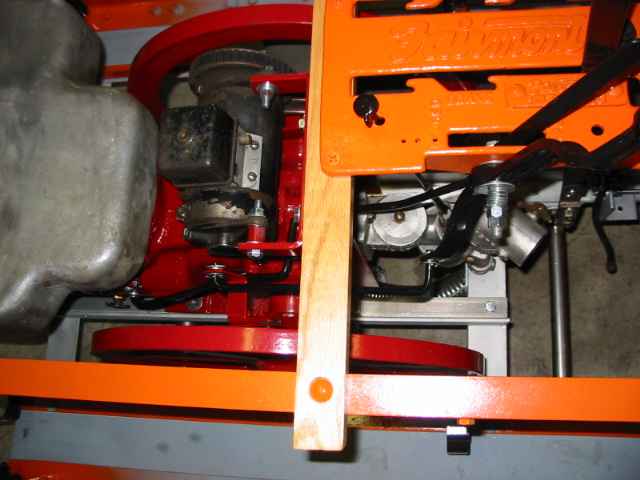
Here's a shot of the control rods to the timer and throttle valve. The 1/4" holes for the rods were so worn that I drilled them out to 5/16" and used that size rod. Right about this time the local hardware store awarded me their Most Valuable Customer Award for all the money I've spent in it........ |
|
|
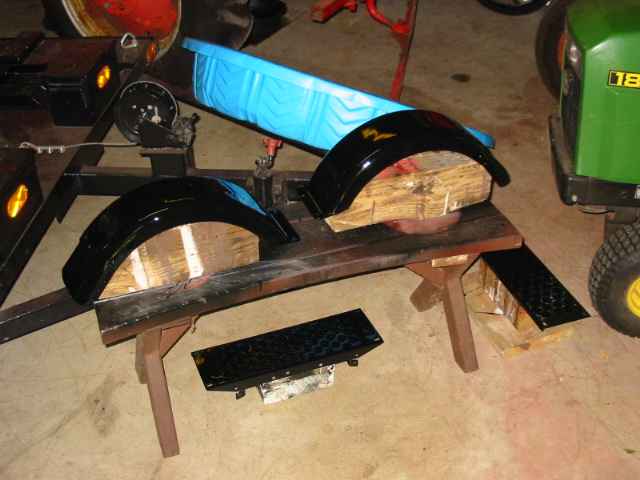
Still painting! Here are the fenders and the step plates. I hand-painted these. It would have worked better if a big storm hadn't rolled through just after I finished the final coat and blew dust through the chinks and gaps in the barn. Oh well, only you and I will notice the imperfections..... |
|
|
Here are the pieces of the deck lid. Back in 1944, Fairmont did use planks of wood, usually 3/8" ash that was painted to match the rest of the car. I used 1/2" white oak and varnished it, two coats each side. |
|
|
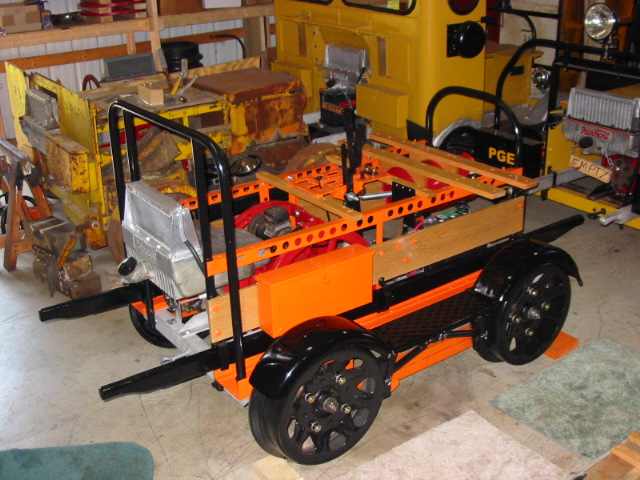
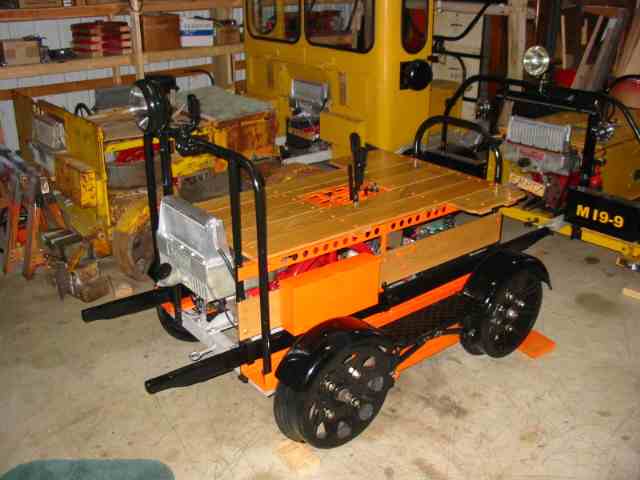
Here it is on August 4, 2003, seven months after I started the project. All that remains to be done is assembly of the deck lid, finishing the wiring and assembling the front headlight. |
|
|
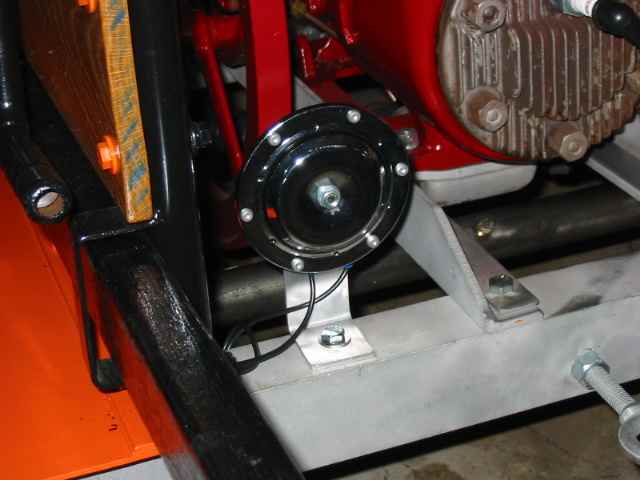
When I have these cars in pieces I like to make them NARCOA compliant. That way I can avoid problems on excursions in the future. To meet the requirement of a bell or horn, here's a 6V motorcycle horn from JC Whitney, discretely placed next to the engine. |
|
|
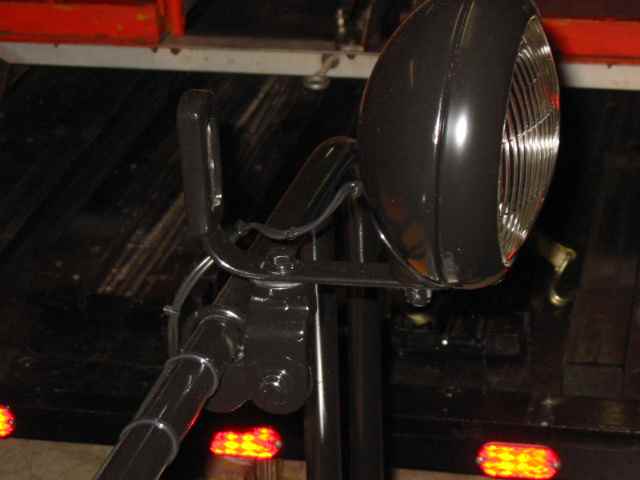
Not a great shot but here's the front light. I bought a swiveling mounting bracket from Les King, planned it black, sand blasted the original headlight and painted that too. I ran a ground wire down to the frame - saves having to worry about making a ground contact through all those painted components. |
|
|
And on August 8th, the deck lid was complete, the wiring finished and the head light installed. It was DONE!!!!!!!!!!! |
|
|
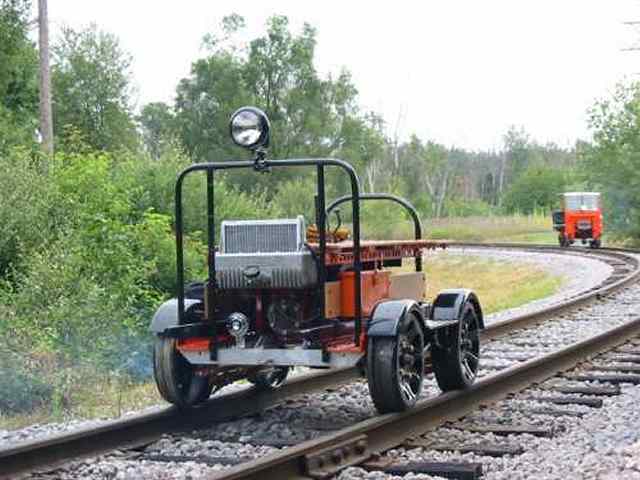
August 9th was the test run. Fortunately the weather was just right for riding an open car. And the good news is that the engine ran perfectly, the car tracked well and nothing fell off or came undone. Is this thing a chick magnet or what???? |
|
|
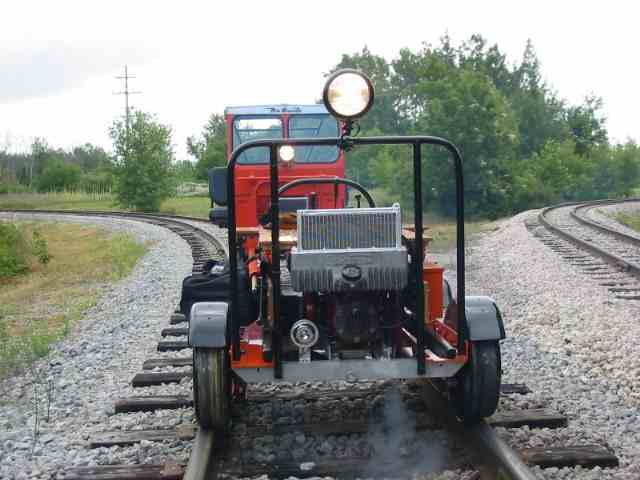
Here's a final shot of the car, steaming away as we wait for the switch on the loop track to be changed. |
|
|
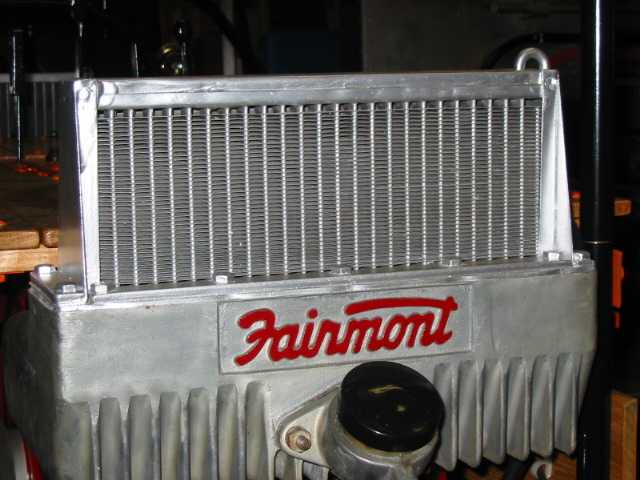
The ceremonial painting of the Fairmont logo on the engine marks the final activity of the project. This was not a difficult conversion from standard gauge. It just took time, diligence, and a little help from my friends. Thank you to Ken, Jim and Eric for their invaluable assistance in making this project a successful one. |
Last Edited 28 January, 2018